Round WesterosCraft logomark
  • Projects
  • Documentation
  • Discord
Round WesterosCraft logomark

WesterosCraft is a free, volunteer fan project not affiliated in any way with GRRM, Mojang, or HBO.

About
  • Projects
  • Rookery
Resources
  • Documentation
  • Map
Community
  • Forum
  • Apply To Build
  • Discord
  • Getting Started
    • Apply To Build
    • ATLauncher Setup
    • CurseForge Launcher Setup
    • GDLauncher Setup
    • Manually Building The Modpack
    • MultiMC Launcher Setup
    • Prism Launcher Setup
  • Rules and Guidelines
    • Canon Project Application Guidelines
    • Community Rules
    • General Building Guidelines
    • Immersion Build Application Guidelines
    • Official No-Redo Rule
    • WesterosCraft Community Charter
  • Guides
    • Basic Building Guide for Applicants
    • Block Usage Guide
    • Installing Optional Mods
    • Installing the Macro Keybind
    • Manually Building the Custom Client
    • New Builders' Guide
    • New Visitors Guide
    • Scavenger Hunts
    • Using GriefDefender
    • WorldEdit Basics
  • Resources
    • A Hunt of Ice And Fire
    • Blue Scavenger Hunt
    • Frequently Asked Questions
    • Map Repository
    • Moderator Cheatsheet
    • Projects Orphanage
    • Schem Sets
    • Season One GoT Hunt
    • Season Two GoT Hunt
    • Server Roles
    • Troubleshooting Guide
  • Miscellaneous
    • 1182 Changelog
    • Custom Resource Pack
    • Downloading the Beta Modpack
  • Archived
    • (Legacy) - WesterosCraft Custom Launcher

CurseForge Launcher Setup

Learn how to easily set up and play on the server using CurseForge Launcher

The CurseForge Launcher is one of the most popular launchers, mainly due to it being tied directly to the biggest Minecraft mod ecosystem. Adding and playing on the WesterosCraft server is very easy with CurseForge Launcher.

Installation


Step 1: Download CurseForge

Download the CurseForge Launcher from their site here: https://download.curseforge.com/

There are two download options - a version with Overwolf and a standalone version. We recommend the standalone version. If you do choose to install with Overwolf, we recommend going into the Overwolf settings and blocking it from running on the CurseForge launcher startup.

Step 2: Install the Modpack

Once in, you want to select a game you want to add a mod for. You obviously want to click Minecraft.

An image of the curseforge landing screen

If this is your first time using CurseForge, you may run into this screen. Just hit the Browse Modpacks button.

A screenshot of the CurseForge launcher when you have no modpacks already installed

In the search bar, search for our modpack using the keywords Westeros or WesterosCraft.

A few choices show up - you want to install The WesterosCraft Modpack:
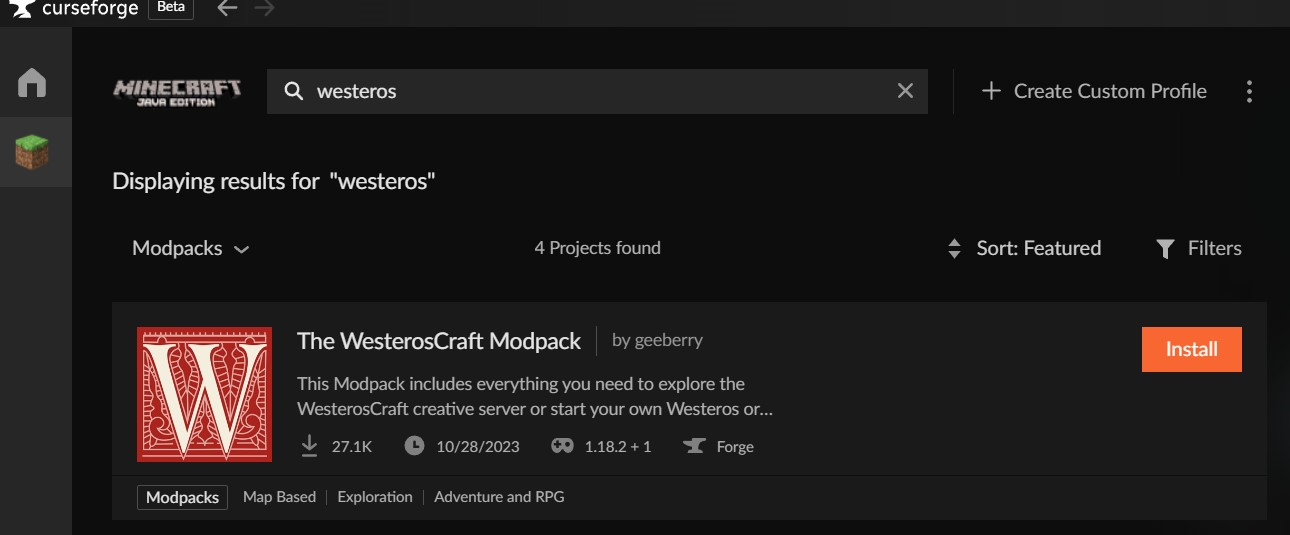
A screenshot of the WesterosCraft modpack after searching for it

Hit install!

Step 3: Join the server!

Almost done! You can launch the game now. The Minecraft launcher will load, and you may need to sign in using your Minecraft account credentials. Hit Play.

A screenshot of the minecraft launcher with the WesterosCraft modpack installed

This is going to launch our modpack! It looks like this:

A screenshot of the WesterosCraft modpack launch screen

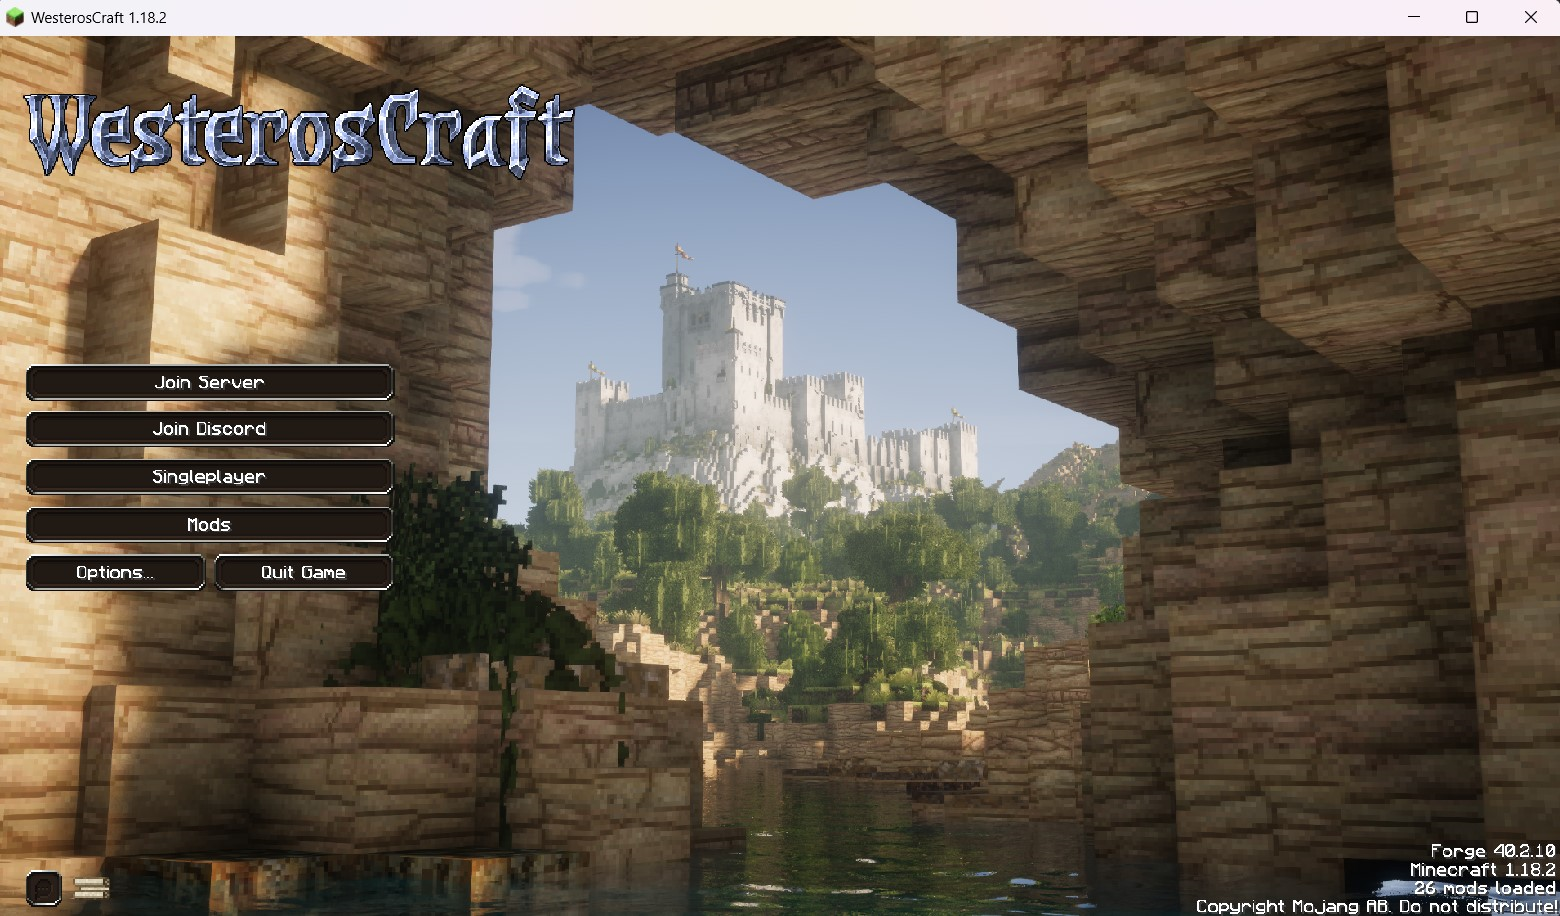
Hop straight into the server and start exploring, or check out our Discord to join our community!

Updating


WesterosCraft updates the modpack on a semi-regular basis with new mods, bug fixes and additional blocks. When this happens, you need to update.

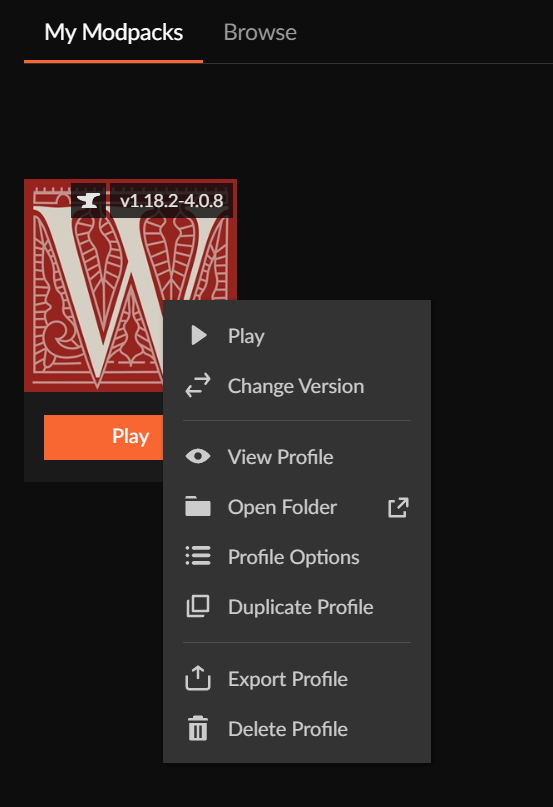
Step 1: Change version

When a new version of the modpack exists, simple right click on the modpack inside the Curseforge Launcher interface, and select Change Version

A screenshot of the context menu in Curseforge

Step 2: Select the latest version

On the Change Version screen, make sure the the version selected is the most current one.

A screenshot of all the versions of the modpack available.

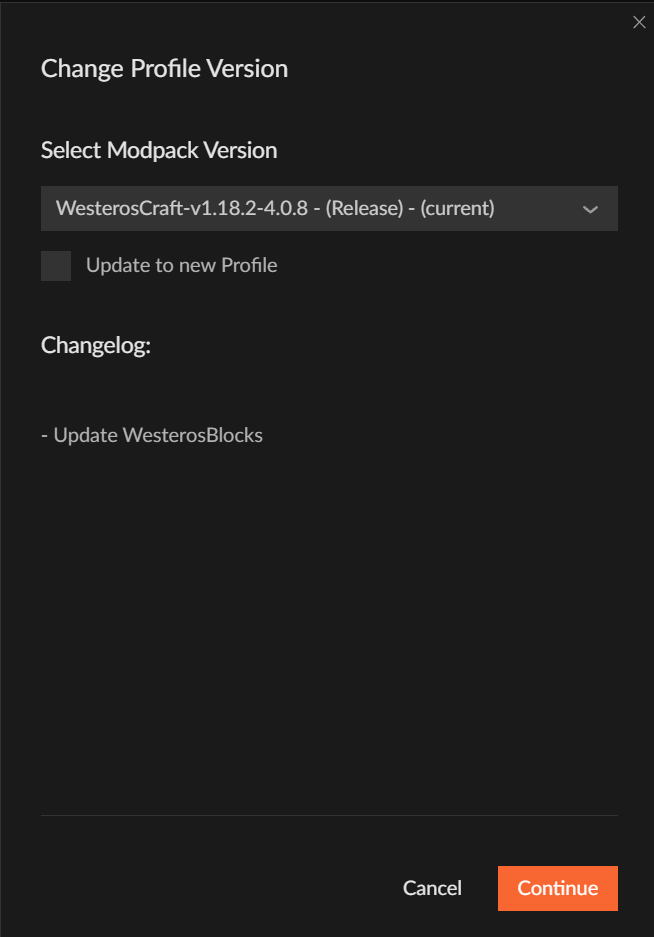
Once selected, click Continue and your modpack will automatically update. Enjoy the new stuff!

  1. Installation
    1. Step 1: Download CurseForge
    2. Step 2: Install the Modpack
    3. Step 3: Join the server!
    4. Updating